The Amazon Fire TV Stick continues to be one of the most popular streaming devices on the planet. It’s affordable, easy to use, and works on almost any TV with an HDMI port. But for brand-new users, the setup process can feel confusing Wi-Fi configuration, Amazon sign-in, updates, settings, installing Downloader, enabling Developer Mode, sideloading, VPN setup… there are a lot of steps you don’t want to miss.
So in this guide, I’m breaking down the exact setup process I show in my YouTube video step-by-step, clearly written, and paired with screenshots from the video itself so you always know what your Firestick should look like at every stage.
Let’s get your Fire TV Stick fully set up, optimized, and ready to stream.

When you plug in your Fire TV Stick for the first time, you’ll see the Amazon boot logo.
The first boot may take a minute — that’s normal.
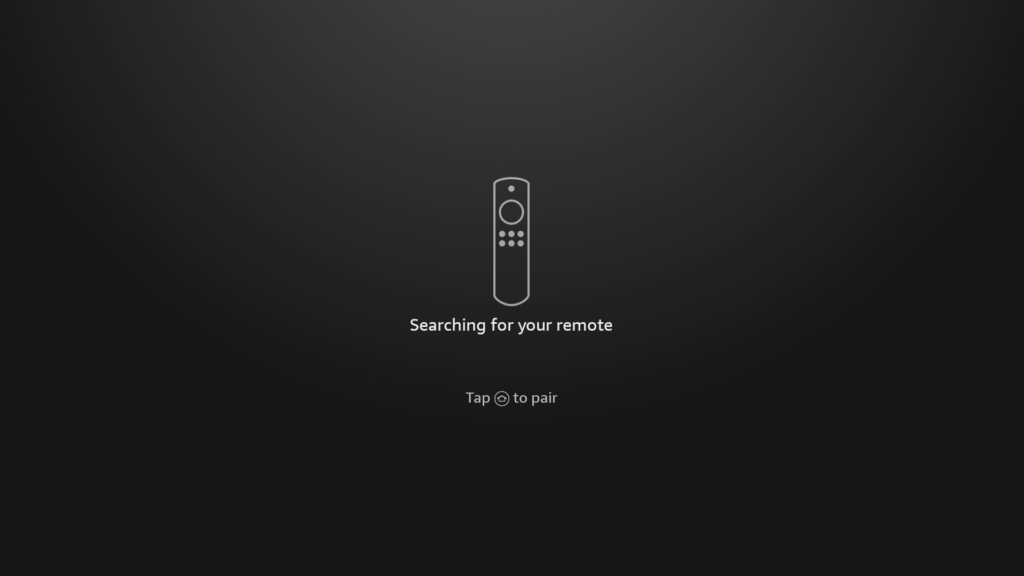
STEP 1: First Boot & Remote Pairing
If your remote doesn’t pair automatically, hold the Home button for 10 seconds.
Then Press Play/Pause to begin setup
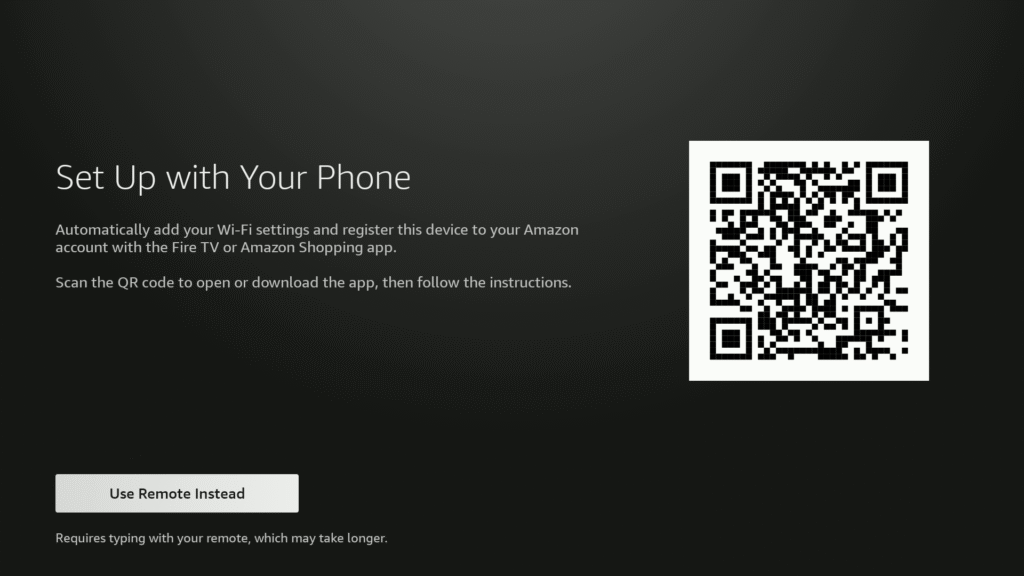
STEP 2: Choose Your Language & Connect Wi-Fi
Select your language (example: English – Canada).
Then choose your Wi-Fi network and enter your password using the on-screen keyboard or your smartphone via QR code.
STEP 3: System Update
Your Fire TV Stick will automatically check for updates.
Let it complete — don’t unplug the device during this part.
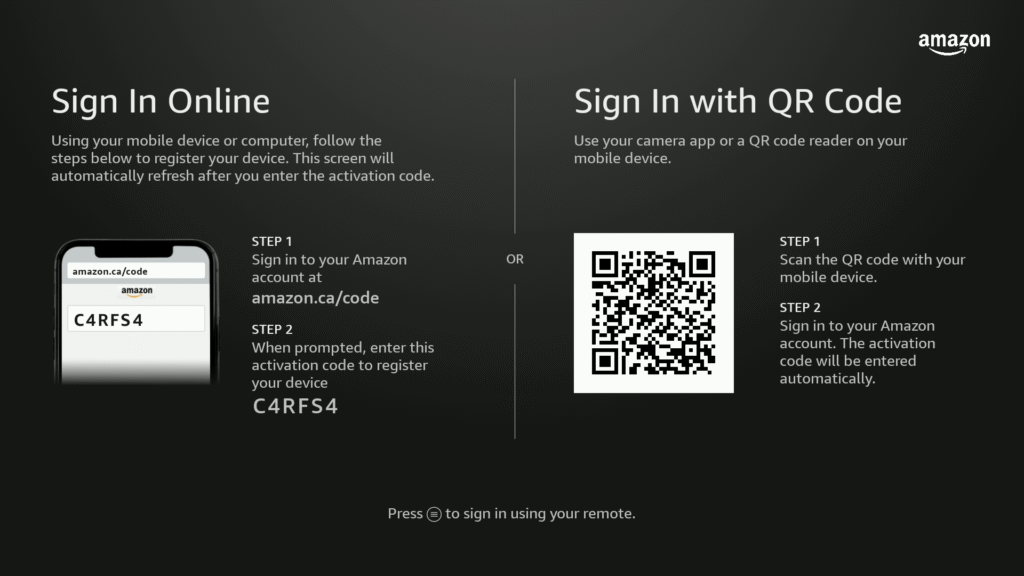
STEP 4: Sign In to Your Amazon Account
You must sign in to use the Fire Stick TV. You can sign in by scanning the QR code or typing manually via amazon.com/code . If you do not have a amazon account create one using the Create a free account option
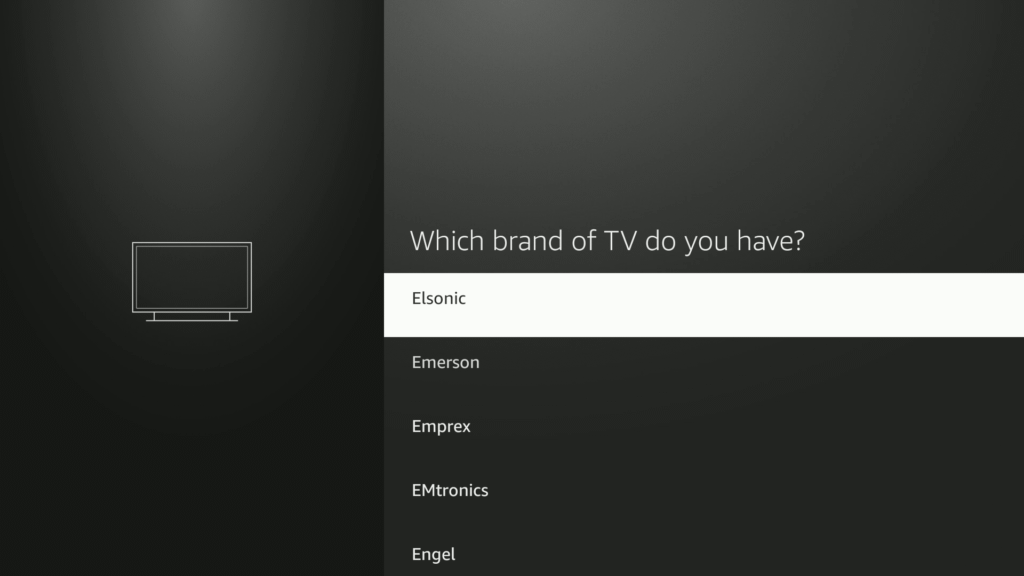
STEP 5: TV Controls, Profiles & Basic Setup
The Fire TV Stick may ask to sync your remote with your TV so you can control the volume.
Then choose your profile.
STEP 5: TV Controls, Profiles & Basic Setup
After you sign in, your Fire TV Stick will ask you to sync your remote with your TV for volume and power controls, then ask you to select your profile.
STEP 6: Choose Your Streaming Services
Amazon will ask you which streaming services you want to pre-install.
You can choose your favourites by selecting Get Started or skip by pressing No Thanks — you can install apps manually later.
This option doesn’t affect performance, so don’t worry if you skip it.
STEP 7: Choose Your Screensaver
You can select between: Stock Photography or Personal Photos (via Amazon Photos)
Most people stick with the default stock images.
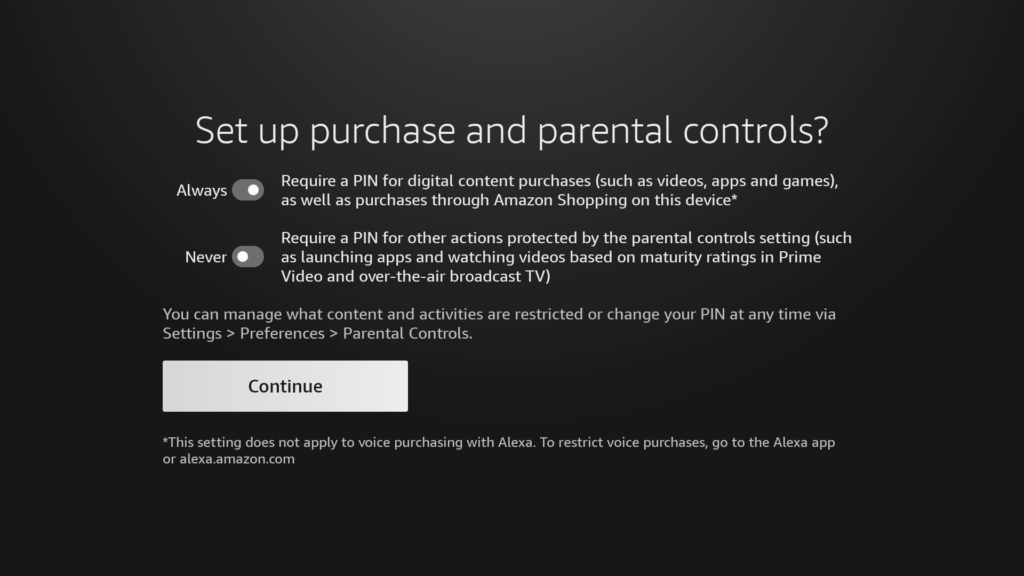
STEP 8: Setup Purchase & Parental Controls
Here, you can:
- Lock purchases with a PIN
- Enable parental controls
- Block specific content categories
This is optional, but recommended if:
- Kids use the device
- You want to prevent accidental purchases
- You have a shared household
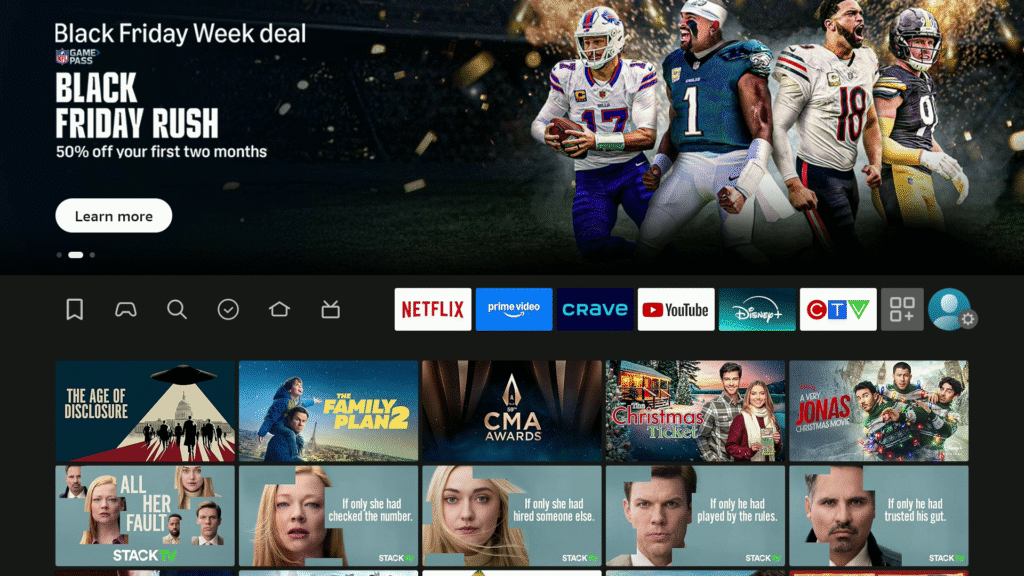
STEP 9: Arrive at the Firestick Home Screen
After finishing the optional screens, you’ll arrive at your fully loaded home screen.
Top menu tabs include:
Home, Find, Live, Free, Apps, and Settings.
This is where your full Firestick experience begins.


